How to set up JoomGallery, a Photo Gallery for Joomla – Joomla Tutorials
How to set up JoomGallery, a Photo Gallery for Joomla
• Check the extensions at extensions.joomla.org. Navigate to Photo & Images/ Photo Gallary and find the page for JoomGallary. Click on download button.
• Click on version you have, from the list of many extensions for components.
• Click on component link. For installation, click on Install tab. Click download button at the bottom. Agree to terms and proceed.
• After installation, click on Components -: JoomGallary. You will receive updated notifications. It is recommended to take backup of your website before updating JoomGallary. Update can be made using a Zip file or auto update option. Click Start autoupdate option. Return to JoomGallary menu.
• Configuration manager has many options for customization. Most of defaults work fine. Check out Help and Information for sorting any problems.
• Click on Category Manager -: New tab. Fill in the details and click on Save button.
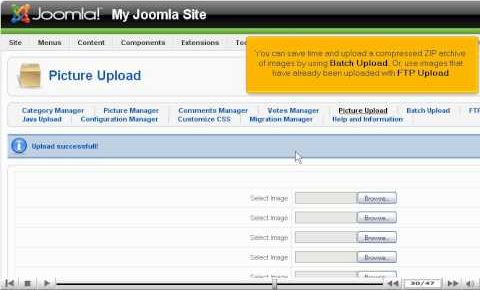
• You will be able to see under Owner and Type that the Administrator created this category using Admin CP. You can upload pictures by clicking on Picture Upload option. Browse it from your system, fill in details and click on Upload button, when done. Contact support, if you face any problems.
• You can choose batch upload or FTP upload. You may also use java uploader over there.
• Take a look at images in picture manager. Choose the picture for changing title or description and then save it, when done.
• You can add a menu link to gallery. Go to Menus -: Top menu. Click on New button at top. Select JoomGallary. Add details. Click on Save button. You can see the gallery by clicking on the gallery tab on Joomla site.